|
A couple of weeks ago, we visited the Eugster's Farm. We had so much fun at the pumpkin patch, apple orchard and petting zoo. I also took advantage of their beautiful pumpkins and bought some for the house.  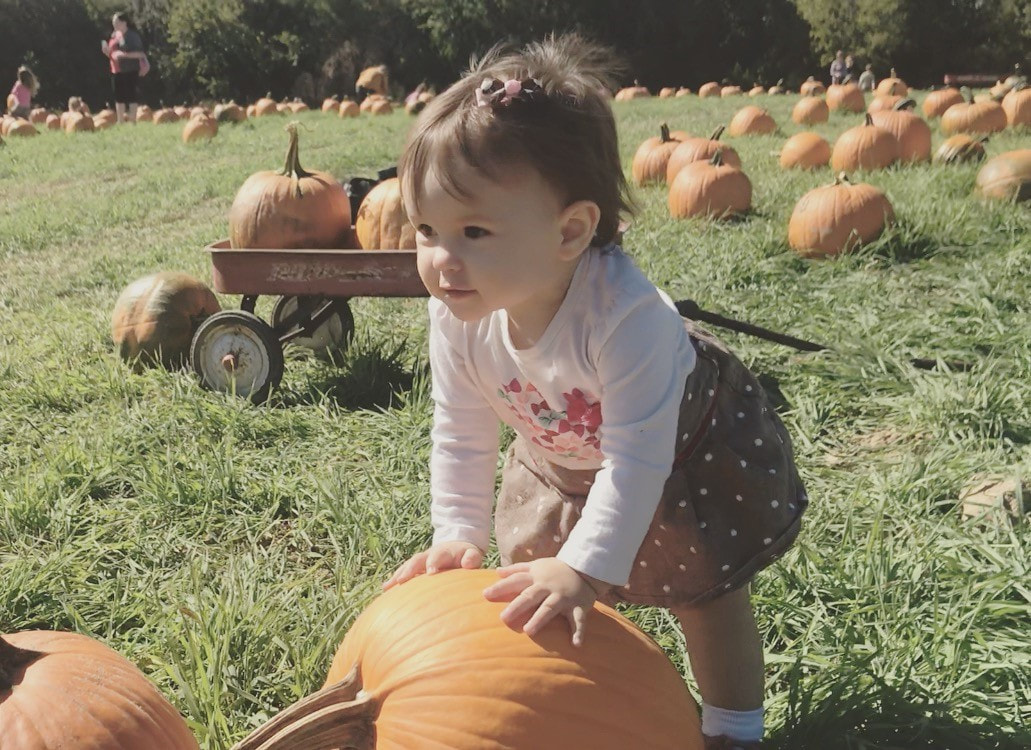 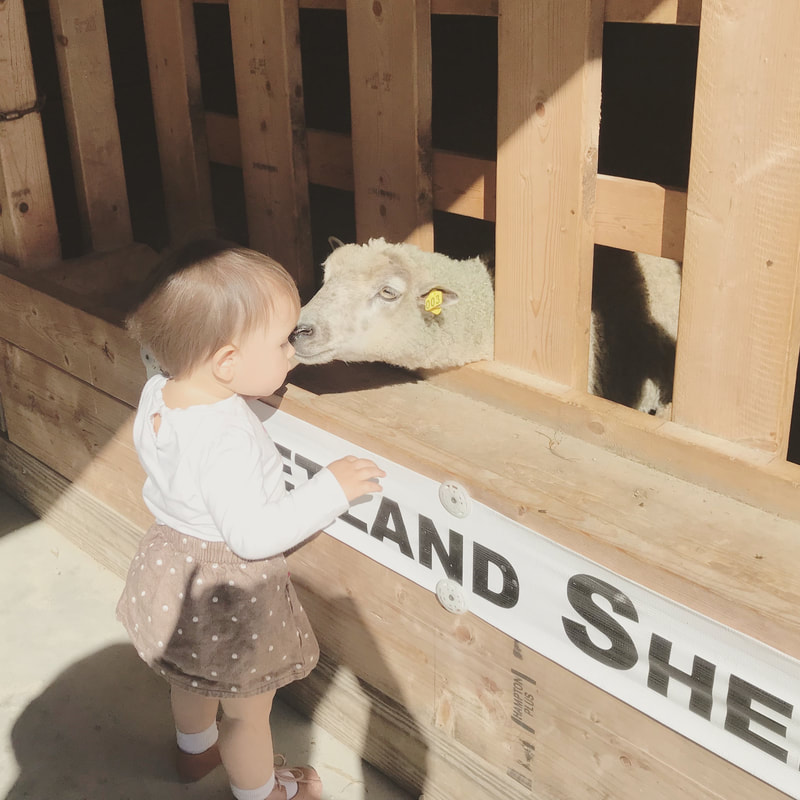 White pumpkins are a perfect white canvas to let your creativity flow! While looking online for inspiration, I came across all kinds of decorations from bedazzle pumpkins to very spooky ones and everything in between. I also loved all the fun ideas for little ones. However, Elia is just 14 months so almost everything she touches ends up in her mouth these days. With my luck, I think I’d rather wait another year than end up in the emergency room with a kid that drank some paint, ate too much glitter or swallowed some beads. 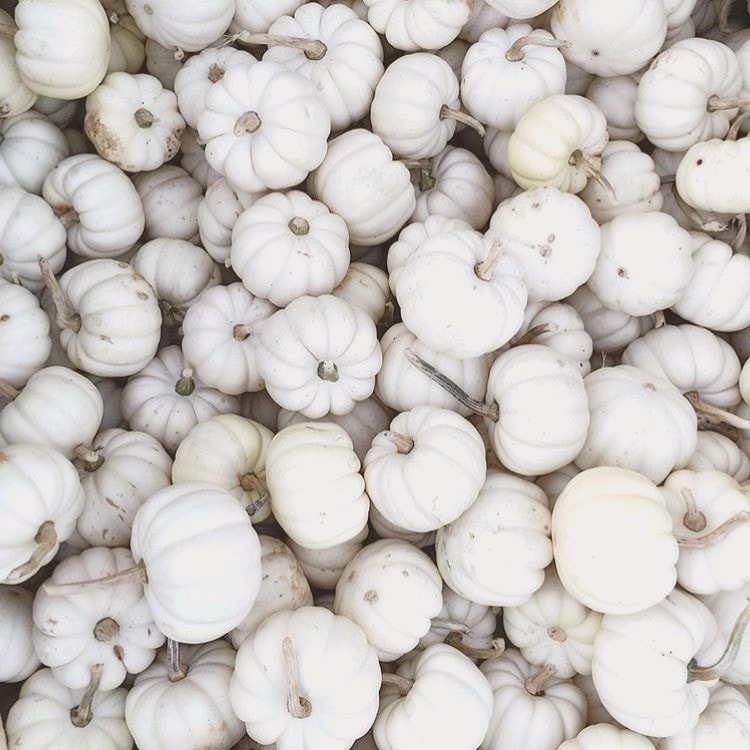 I found some pumpkin doughnuts online and I immediately fell in love with the idea. Again, in order to avoid any accidents, I avoided paint and used Sharpie markers instead. There have so many colors except for white so for the "white glaze" doughnut, I used a chalk white marker. Painting white pumpkins turned out to be a super simple DIY Halloween craft. They dried fast, no spray coat needed and no mess to clean! 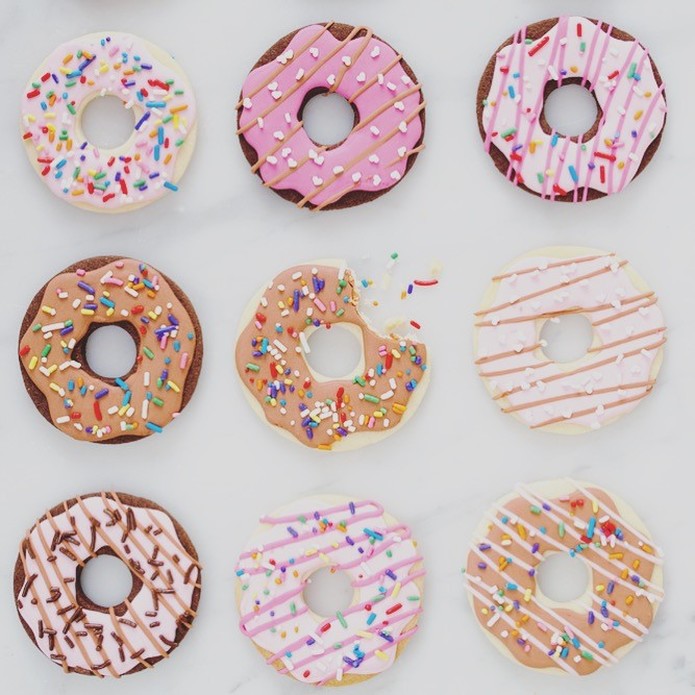 The Inspiration 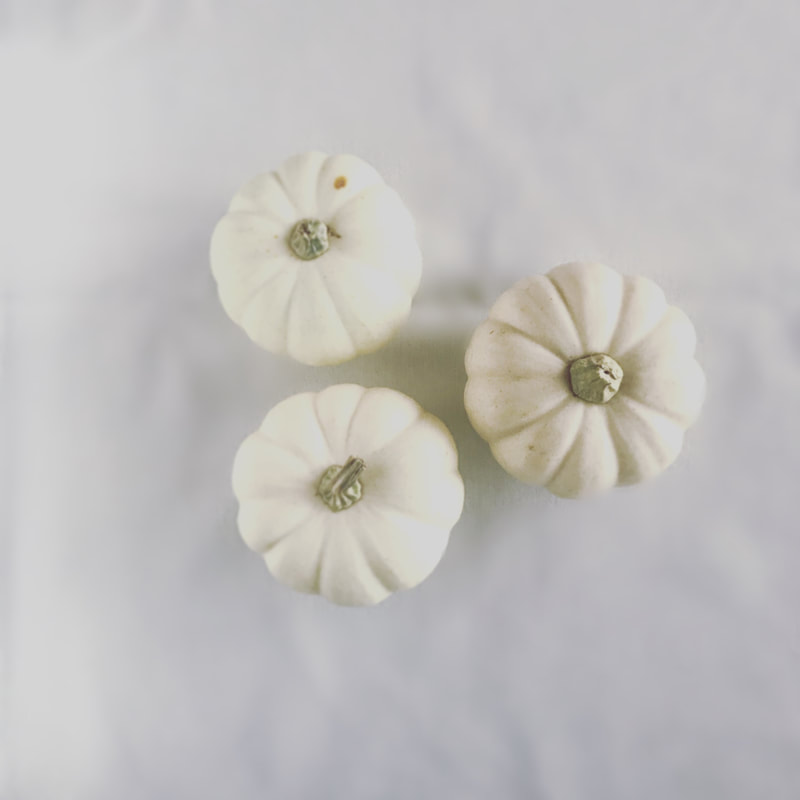 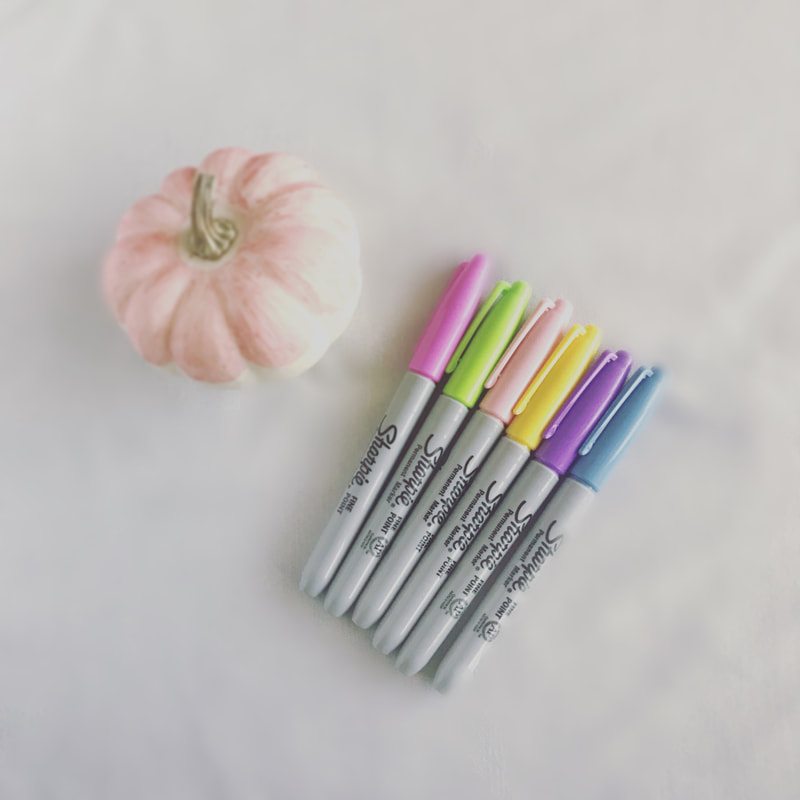 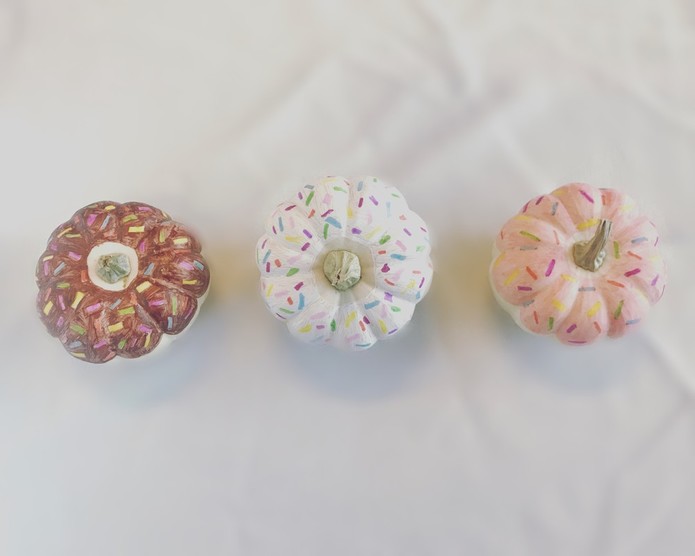 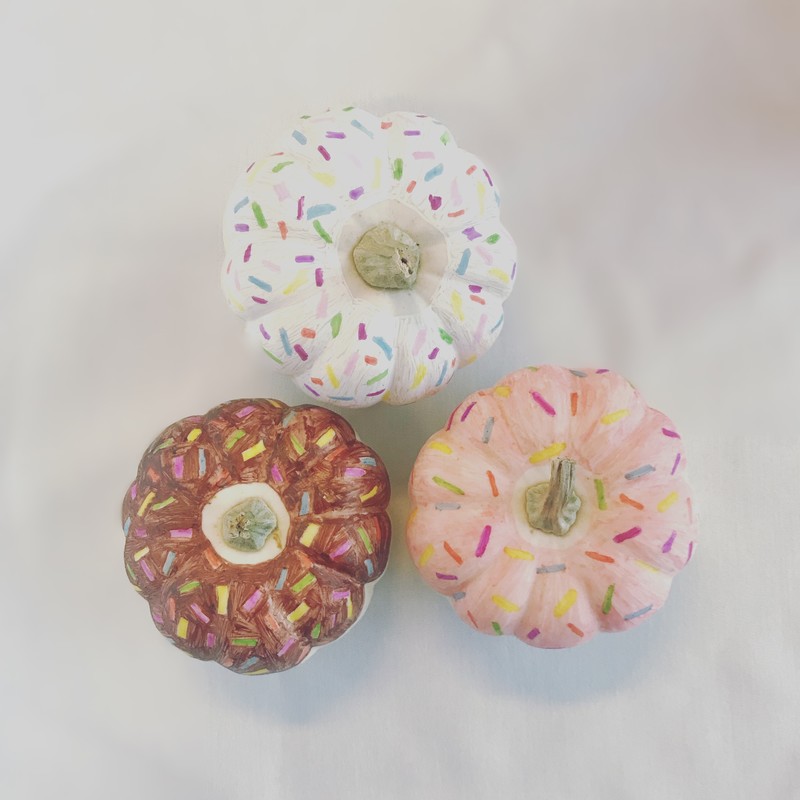
0 Comments
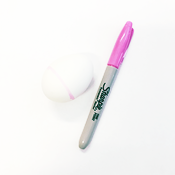
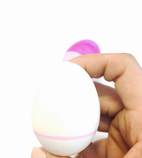
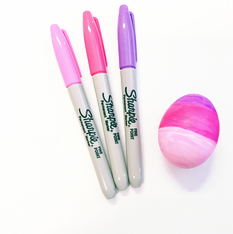
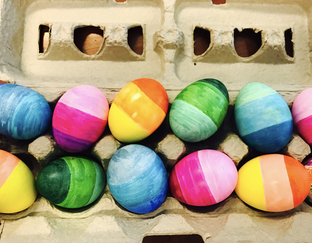
 This was Elia's first Easter and it was filled with lovely memories! From picking out an Easter outfit (dress, tights, shoes and even a beret) to a wonderful easter service on Sunday followed by a yummy Easter brunch, we had fun all weekend long! On Saturday, after I hard boiled the eggs, I knew I had to make simple decorations. 1. Time is a hot commodity these days. I knew I had to decorate 12 eggs in not more than one hour. 2. I had to move quickly! Elia was not going to wait for those eggs to be ready before grabbing them and putting them in her mouth and break them or eat them. 3. Elia's attention spam is short. After we finished she was so over the eggs and ready to move on the the next thing! So what to do when you have all these challenges? I decided that my super ambitious ideas to paint with water colors, attempt a time-consuming mandala design or use any glitter would have to wait a few years. Instead I used a 24 pack of bright colorful fast dry Sharpies! We had a lot of fun doing mostly hombre design... 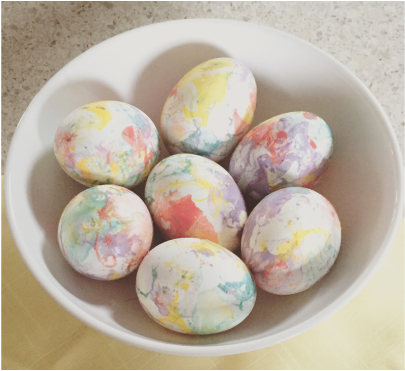 With a little abstract painting inspiration from Jackson Pollock and nail polish, I was able to decorate my eggs just in time for Easter Sunday. This year's Easter eggs were messy but fun! I cannot wait to continue this special tradition with my little one next spring! Here are the supplies and steps: 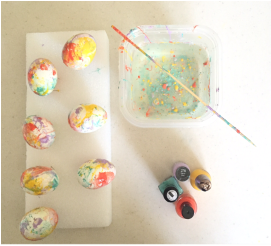 Supplies: - Room temp hard boiled - Disposable plastic container - Nail polish - any color combination - Rubber gloves - Stir stick - Pins - Room temp water - Styrofoam - size depends on how many eggs you have Steps: 1. Fill plastic container 3/4 full with room temperature water. *If the water is too cold the polish will sink. 2. Add a few drops of nail polish. The more drops of polish, the more covered the egg will get. 3. Lightly stir with stick to make a "marble" look in water. 4. Dip the egg under the water and swirl. Wear rubber gloves. 5. Dry the eggs. I took a piece of styrofoam and used pins to make a drying rack. 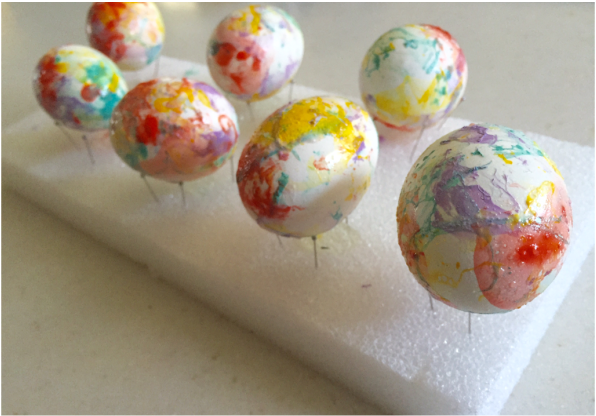 Happy Easter! Felices Pascuas!
If you are not creative or "artsy" there are plenty of blogs, magazines and Pinterest ideas for Easter egg decorations. I spend a few minutes online collecting pictures that I would copy or use as an inspiration for my Easter eggs. Here are my favorite ones:  * http://queenbee1924.tumblr.com/post/81582887683 * http://ana-rosa.tumblr.com/post/83244079988 * http://www.familycircle.com/holiday/easter/ * http://www.apartmenttherapy.com/7-incredibly-lastminute-easytodo-goodlooking-easter-egg-looks-202586?crlt.pid=camp.QndZTYc3cYyM The possibilities are endless! I didn't have much time so I decided that I would draw different designs using a permanent gold sharpie on white eggs. The nice thing about Sharpies is that it dries very fast however if the ink still fresh, you can accidentally create smudges with your fingers so after I practiced with one egg, I started working on the rest of the eggs one side at the time so that my fingers never had to touch a part that has been finished without being completely dried. A few people asked me if I used stencils but I didn't. As you can see some of the designs look like my inspirations. If you don't have a steady hand, a stencil might come in handy!  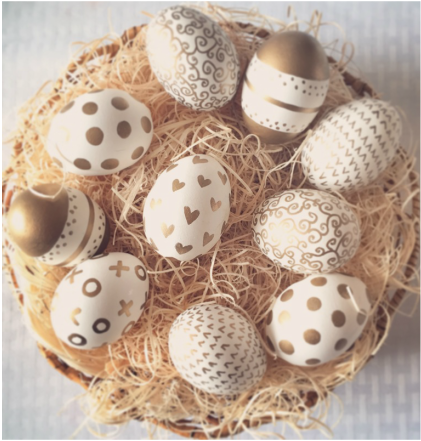 Felices Pascuas! Happy Easter!
|